Devlog #2 - How we used Blender to simulate claymation
One of the first things we did when we set out to make a mixed-media style game was ask ourselves this:
How do we make something like this even possible?
Working with a friend of mine, Pann Prechachevawat, I learned how to model, rig, and animate in Blender. Working together, we figured out this claymation workflow, which I am now communicating to you all on our behalf. Alongside this, he also created the shaders we use to simulate the claymation look on our meshes, and handled the animations for our main character. Thanks, Pann!
(You can find Pann's works here: https://www.instagram.com/p1a2n3n4/)
The process, at a core level, involves keeping your meshes low-poly, which helps prioritize exaggerated shape language. To use Blender terminology here, this essentially means starting out with the Cube, gradually bringing a rough mesh into form, and applying a subdivision at 1-2 levels at most.
One of the BIG factors at play with the meshes is a Remesh modifier that is applied to maintain a bit of a gloopy clay feel when meshes group up. For example, making a character, you would want the upper arms, upper legs, and torso to Remesh together, giving it a clay feel. The feet, hands, and head you have on separate meshes so they maintain their forms.
A simple Armature setup is applied to the mesh once the modeling phase is done, using simple Forward Kinematic joints for the most part. It doesn't need to be anything crazy; In fact, it actually helps it feel more real!
In our specific project, too, one thing Pan set up in addition was a shadow catcher to simulate the shadow on a transparent plane. This also involved some pretty detailed Shader graph node setup, but should be fairly simple to recreate.
Example of a fully animated model, fully handled by myself. A lot of the heavy lifting visually is done by the shaders, but overall, it saves a lot of time in the UV phase!

Another example of the animation pipeline at work, this time for our first boss, made by team member Jada Woods!
The last thing I'll touch on here is that we captured normal maps of each of the models when rendering for a dynamic lighting approach. While this served to be a little too difficult to do for our animations in Unity (requiring, in essence, a shader programmed to switch normal maps between up to 32 renders depending on avatar action), we applied this to static models in the environment.
Some of our models, though, were made in real-life via arts and crafts. How did we capture normal maps for those?
Here's a sneak peek for you (you can find out more in the next Devlog!):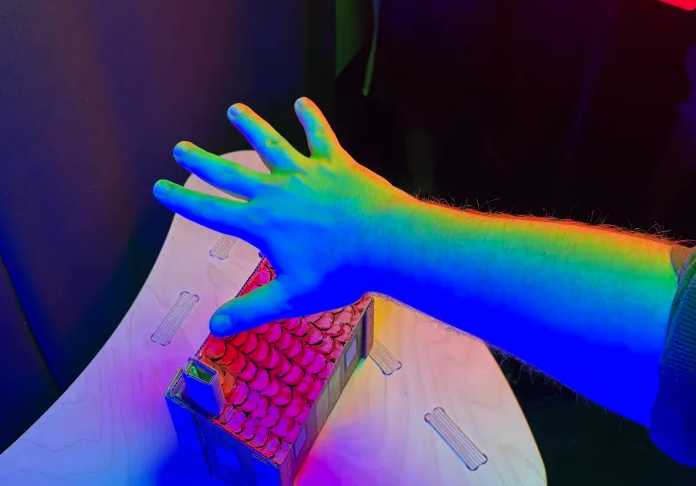
This link takes you to the extended documentation we wrote out explaining the workflow in Blender.
Leave a comment
Log in with itch.io to leave a comment.